


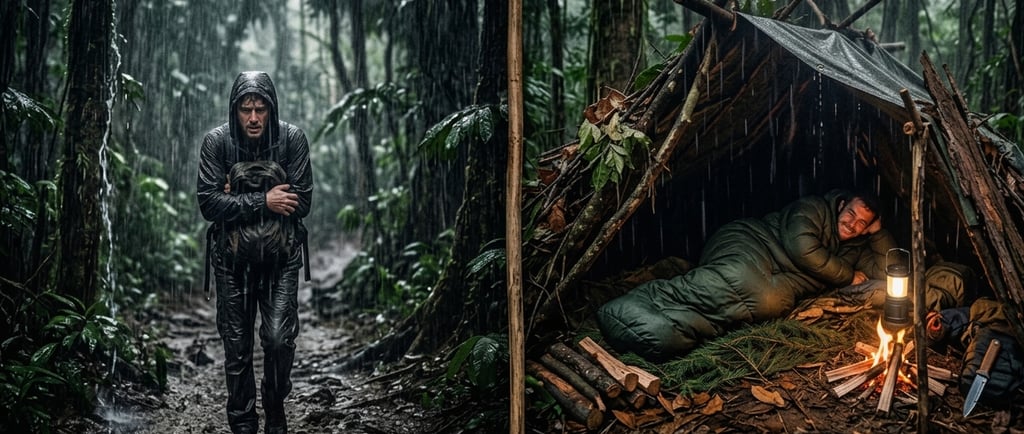
How to Build a Wilderness Shelter in 5 Steps (Even Without Equipment)
It was 5 PM when Emma realised she wasn't going to make it back to camp before dark. The trail had split twice with no markers, the temperature had already dropped seven degrees and the wind was picking up from the north. She had a knife, forty metres of paracord, a lighter and the clothes on her back. What saved Emma that night wasn't luck. It was a weekend survival course she had taken eight months earlier that she never expected to need. She found a sheltered slope, gathered materials, and built a functional debris hut before the light completely faded. She woke up cold but alive, oriented and moving before 7 AM. Building a wilderness shelter is the most underestimated survival skill in existence. Most people associate outdoor survival with fire, water and food — but exposure to cold, wind and rain kills far more quickly than hunger. Without shelter, hypothermia can set in within two hours in moderate conditions. With a well-built shelter, you can survive for days. This guide covers the five essential steps, the mistakes that cost lives and the minimum kit every outdoor person should carry.
5/5/20267 min read
Why Shelter Is the Number One Priority in Survival
There is a well-established hierarchy in survival situations: protection before water, water before food. The reason is mathematical. Without shelter in adverse conditions, the body can fail within hours. Without water, you have days. Without food, weeks.
Hypothermia doesn't announce itself. It begins with shivering, then mental confusion, then inability to make decisions — and in advanced stages, the victim paradoxically feels warm and begins removing clothing. Knowing how to build shelter before the cold arrives is, quite literally, a matter of life.
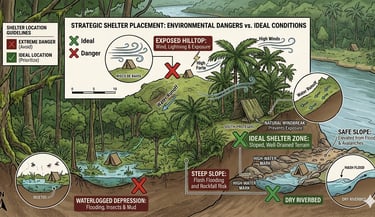
Step 1 — Choose the Right Location Before Anything Else
Most people make their biggest mistake here: they start building at the first spot that seems reasonable without assessing the terrain. A badly located shelter can be more dangerous than no shelter at all.

What to Look For in a Good Location
Look for natural wind protection — a slope that serves as a back wall, a rock formation, a dense group of trees. Wind strips body heat through convection as lethally as rain.
Check that the ground has a slight slope for water drainage — a minimal angle prevents you from waking up in a pool of mud. Avoid depressions, valley floors and any area that looks like it collects water.
Stay away from dry riverbeds — they fill suddenly from rain falling kilometres away with no local warning. Avoid dead trees or branches — night wind can bring them down onto the shelter.
If rescue is a possibility, choose a location visible from the air — near a clearing, open field or area with colour contrast visible from altitude.
The Three-P Rule
Protection from the elements. Proximity to resources — water and building material. Position visible for potential rescue. No location perfectly meets all three — make conscious trade-offs, not random ones.
Step 2 — Choose the Right Shelter Type for the Situation
There is no universal shelter. The ideal type depends on the climate, available time, accessible materials and how many people need protection.
Lean-To Shelter — The Fastest to Build
The lean-to takes 20 to 30 minutes with natural materials. Ideal for rain and lateral wind when time is limited and maximum insulation isn't the primary need.
How to build: lash a horizontal branch between two trees at shoulder height using paracord or strong vine. Lean long branches at a 45° angle against it to form the angled wall. Weave smaller branches horizontally between them for structure. Cover with layers of leaves, ferns and bark, always working bottom to top — like roof tiles — to direct water away from the interior.


TECEUM 5/32" Paracord Rope 1000 – 1000ft / 200ft / 100ft / 50ft – Tactical Parachute Cord 4mm – 45+ Colors – Nylon String for Survival & Camping Gear – Stripe Cord for Survival – Utility Rope

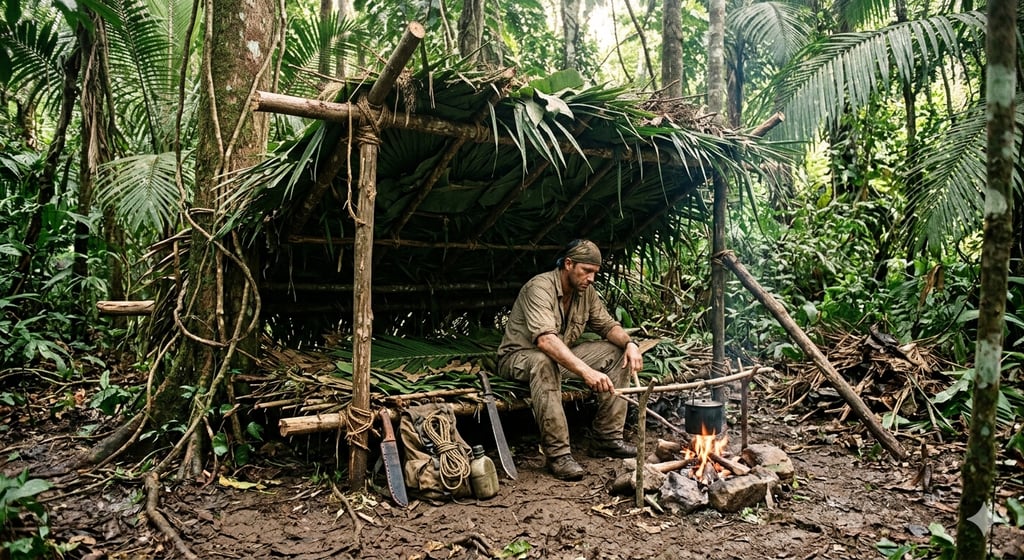
Debris Hut — The Warmest Option
For intense cold and long nights, the debris hut is the most thermally efficient shelter you can build with your hands. It functions like a giant sleeping bag made of natural material.
How to build: rest a three-metre ridgepole in a tree fork at one metre height — this is the spine. Lean smaller branches on both sides creating a ribbed skeleton. Cover completely with at least 60 cm of dry leaves, moss and vegetation — that thickness is critical for thermal insulation. Build a "door" from a bundle of branches to block the entrance.
The internal space must be tight — only just enough to turn over. The smaller the space, the faster it heats with your body warmth.


Go Time Gear Life Bivy Emergency Survival Sleeping Bag Thermal Bivy - Use as Emergency Bivy Sack, Survival Sleeping Bag, Mylar Emergency Blanket
Tarp Shelter — The Most Versatile
If you carry a tarp or emergency poncho, your options multiply dramatically. The fastest configuration for heavy rain: tie the tarp over a line between two trees at chest height, let it fall symmetrically on both sides forming an A-frame, and stake the lower edges at 45° to the ground. The opening must always face away from the dominant wind.
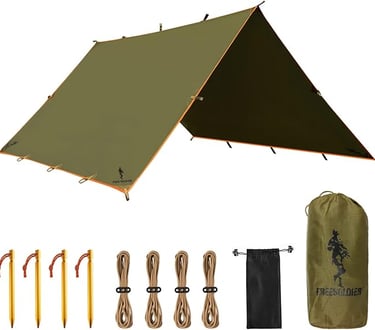
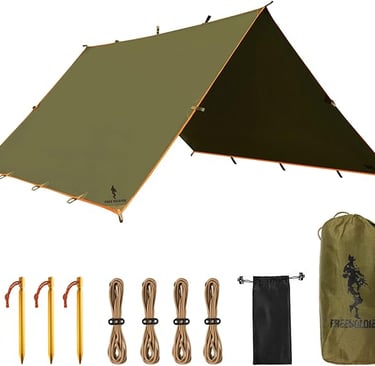
Free Soldier Waterproof Portable Tarp Multifunctional Outdoor Camping Traveling Awning Backpacking Tarp shelter Rain Tarp
Step 3 — Insulate the Ground Before the Roof
This is the most commonly made and most dangerous mistake: people carefully cover the roof of the shelter and then sleep directly on cold ground.
Earth steals body heat 25 times faster than air at the same temperature. Sleeping in contact with soil at 15°C can be colder than sleeping in the open air at 5°C with good insulation. Ground insulation matters more than roof insulation.
How to Create Effective Ground Insulation
Collect as much dry leaf litter, ferns, moss, dry grass or any bulky plant material as possible. Pack it into a layer at least 15 cm thick inside the shelter. Your body weight will compress it to approximately 8 cm — still sufficient.
If you have a tarp, place it under the insulating material to block ground moisture. Never sleep directly on mylar without insulation between you and it — it traps moisture and will make the situation worse.
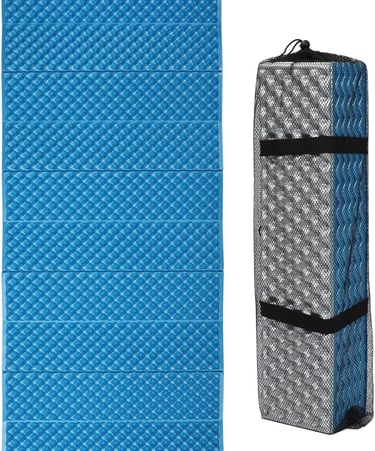

REDCAMP Foldable Foam Camping Pads for Sleeping, Waterproof Closed Cell Foam Camping Sleeping Pad - Ultra-Lightweight for Hiking & Backpacking, R-2.1...
Step 4 — Build Small and Build Right
There is a natural temptation to build a large shelter — room to move, to sit up, to store gear. Resist this impulse completely when thermal survival is the goal.
A large shelter loses heat exponentially faster than a small one. The objective is to create a microclimate that your own body heat can maintain. For that, the internal space must be only slightly larger than your body volume.
The Hug Test
When the shelter structure is complete, lie down inside it. If you can roll over and the walls don't touch you at any point, it's too big. Add material to the inner walls until the space is snug but comfortable.
The Leaf Rule
For debris coverage, there is a simple practical rule: the amount of leaves you collect should be enough to fill the completed shelter three times over — with settling and compression, what seems like far too much is exactly what's needed.
Step 5 — Finish, Test and Follow the Safety Protocol
Before sleeping, run a complete check.
Verify the wind direction and confirm the opening is correctly positioned. Test waterproofing with the hand test — slide your hand inside from the entrance while someone pours water over the roof. Look for water entry points.
If you lit a fire nearby for warmth, never bring embers inside the shelter — genuine risk of carbon monoxide poisoning even in leaf structures. Instead, heat large stones in the fire, wrap them in clothing and place them inside — they work as natural hot water bottles.
Create a visible rescue signal near the shelter: stones in X or SOS formation in an open area, brightly coloured material, or anything that contrasts with the surrounding terrain.
The 5 Mistakes That Can Turn a Shelter Into a Problem
Building at the bottom of a valley. Cold air is denser and accumulates naturally in low terrain — valley floors are always the coldest points in any landscape, with the additional risk of flooding.
Ignoring ground insulation. Already discussed, but worth repeating: the ground is the biggest heat thief in any camping or survival situation.
Building too large. Space is comfort but it's also heat loss. In survival, prioritise thermal efficiency over comfort every time.
Not testing before sleeping. Lie in the shelter before full darkness. Is there a draught? Is the ground firm? Will the structure hold if the wind picks up?
Forgetting minimum ventilation. A completely sealed shelter accumulates moisture from breathing and perspiration, making the interior damper and colder than the outside. Leave a small ventilation gap at the top of the entrance.
Minimum Kit for Emergency Shelter Construction
These items fit in a 200g pouch and can be the difference between a hard night and a critical situation:

Paracord Rope 1000 – 1000ft / 200ft / 100ft / 50ft – Tactical Parachute Cord 4mm – 45+ Colors – Nylon String for Survival & Camping Gear – Stripe Cord for Survival – Utility Rope


Free Soldier Waterproof Portable Tarp Multifunctional Outdoor Camping Traveling Awning Backpacking Tarp shelter Rain Tarp
Go Time Gear Life Bivy Emergency Survival Sleeping Bag Thermal Bivy - Use as Emergency Bivy Sack, Survival Sleeping Bag, Mylar Emergency Blanket
MSR Groundhog Tent Stake Kit
Gorilla Tape, 1.88 in x 10 yd, Silver (Pack of 1) - Duct, Utility, Triple Layer Strength, Indoor & Outdoor, Weather Resistant Shell
Conclusion: The Best Shelter Is the One You Build Before You Need It
Emma reached base camp the next morning, rested and oriented. Her group couldn't believe she had spent the night in the wilderness without incident. The difference wasn't luck — it was knowledge applied at exactly the right moment.
Learn to build a wilderness shelter before you need to. Practise at your next camping trip — not because you're lost, but because when the moment comes, your hands will already know what to do.
Found this guide useful? Save it, share it with your outdoor companions and explore the rest of the survival and preparedness content here on the blog.
Contact
Contact us for questions or suggestions.
© 2025. All rights reserved.
suportedoisb@gmail.com