


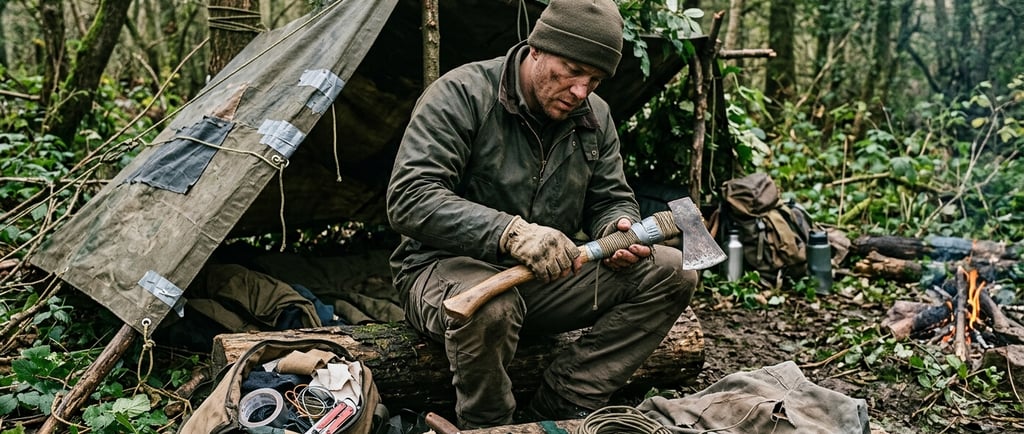
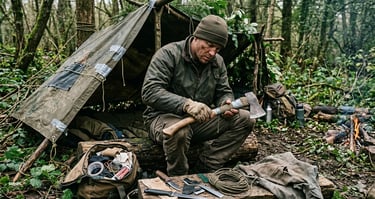
Basic Repairs: How to Fix Tools, Clothing and Shelter in Any Situation
A knot that slips. A seam that tears. A tarp that gets punctured. A knife that goes dull. A shelter that starts letting rain in. In the wild, at camp or in a real emergency, equipment fails. Always at the worst possible moment. And the ability to repair, improvise and adapt what you have on hand is one of the most valuable — and most neglected — skills in any serious survival preparation.
BARBARA COSTA
4/22/20265 min read
PART 1 — Tool Repairs
Tools are extensions of your body in a survival situation. A dull knife, a blunt axe or a frayed rope aren't just useless — they're dangerous.
🔪 How to Sharpen a Knife Without a Whetstone
With a natural field stone: Look for granite, quartz or fine sandstone — stones with uniform, slightly abrasive surfaces.
Wet the stone with water or saliva to reduce friction
Hold the blade at 15 to 20 degrees against the surface
Slide the blade forward as if "cutting a thin slice" off the stone
Keep the angle constant — this is the single most important factor
Alternate sides every 5 to 10 strokes
Finish with lighter strokes to remove the burr
With ceramic, glass or porcelain: the unglazed base edge of a mug or plate is an excellent sharpener. Use the same movement.
With leather (for final honing): run the blade along a leather belt or sheath — removes the microscopic burr and produces a razor-sharp edge.
Paper test: try to slice paper smoothly. If the knife cuts cleanly without tearing, the edge is adequate.
🪓 Axe and Machete Field Maintenance
Loose head:
Remove the handle completely from the eye
Dry the wood near fire heat for 20–30 minutes — dry wood expands as it absorbs moisture in use
Reposition and strike firmly on the end opposite the blade to seat
For extra security: insert hardwood wedges perpendicular to the handle grain, or use an angled nail
🪢 Rope and Cordage Repair
Worn or cut rope:
Paracord: fuse the ends with a lighter to seal
Natural fibre rope: unravel the fibres at each end, interweave and twist together for at least 15 cm
Never trust a rope with more than 30% of its diameter cut for load-bearing use
Improvising rope in the field:
Inner bark fibres of willow, cedar and birch twisted into cordage
Nettle stalk fibres — strength comparable to cotton
Thin pine roots — remarkably strong, used by indigenous peoples for stitching birch bark
Braided palm leaf strips produce very strong rope
Basic 2-strand rope twist technique:
Gather fibres into two equal bundles
Twist each bundle clockwise with your fingers
Wrap both bundles together counter-clockwise
The opposing tension of the two movements holds the rope together without a knot
🎥 Watch: How to improvise tools and cordage in the field:

👗 PART 2 — Clothing Repairs
Torn clothing in the field isn't just aesthetically unpleasant — it's a functional emergency. Ripped fabric loses thermal insulation capacity, exposes skin to hypothermia, sunstroke, insects and abrasions.
🧵 Emergency Sewing Without a Sewing Kit
Improvised needle:
Large fish bone sharpened to a point
Thin nail honed to a point against a stone
Hardwood splinters (bamboo, oak) sanded down until thin
Safety pins (always carry at least 5 in your pack)
Improvised thread:
Inner strands of paracord (each 550 paracord contains 7 internal nylon strands — strong and fine enough for sewing)
Thin fishing line (monofilament)
Waxed dental floss (highly recommended — strong, thin, waterproof, available everywhere)
✂️ Field Sewing Techniques
Running stitch (for linear tears):
Start 1 cm beyond the end of the tear
Pass the needle perpendicularly through the fabric
5 to 7 mm spacing between stitches
Finish with 3 overlapping stitches at the same point
Cross-stitch (for tears with loose edges): More resistant than running stitch. Alternates sides diagonally, creating an X pattern that distributes tension.
Patch repair: For larger holes, patching is more durable than direct stitching:
Cut a fabric patch with at least 2 cm of margin beyond the hole on all sides
Position over the hole and stitch around the full perimeter
For maximum reinforcement, add a grid of stitches inside the patch
🩹 Repair Without Needle and Thread
Duct tape: the universal repairer. Apply inside and outside the tear for maximum strength
Contact adhesive or super glue: for neoprene, leather and synthetic materials
Safety pins: for quick temporary repairs — open seams, lost buttons, zip failures
🥾 Boot and Footwear Repair in the Field
Sole separating:
Clean and dry both surfaces thoroughly
Apply strong contact adhesive to both surfaces
Wait 5–10 minutes until "tacky but not wet"
Press and bind with paracord or fabric strips for 30–60 minutes
Soaked boots: never dry at direct heat — leather shrinks and cracks. Stuff with crumpled paper or dry grass and air-dry.
Broken lace: replace with paracord, twisted electrical tape, hood cordage, leather strips or thin vine.
🏕️ PART 3 — Shelter Repairs
A damaged shelter in rain, cold or exposed terrain can escalate from inconvenient to emergency quickly.
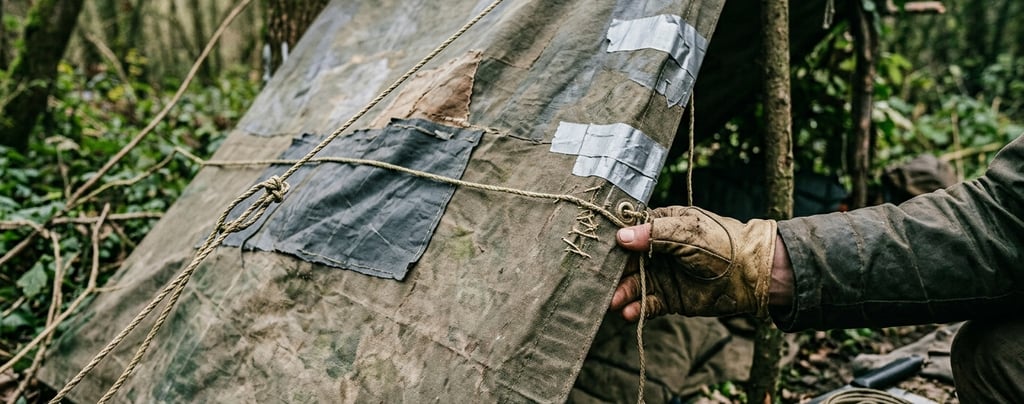
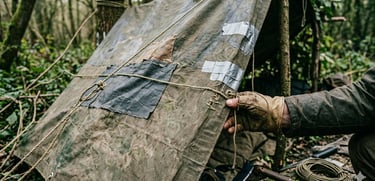
🛖 Tarp Repair
Small hole (up to 3 cm):
Dry the area thoroughly
Apply duct tape inside and outside in a sandwich
For permanent repair: tarp repair tape with light heat to activate adhesive
Linear tear:
Apply duct tape along the full length of the tear, extending 5 cm beyond each end
Apply a second perpendicular layer to distribute tension
Reinforce with stitching at the highest tension point if possible
Torn-out grommets: The grommets are critical failure points — they concentrate all tie-down tension.
Without repair kit:
Create a "button" from a small stone or round piece of wood
Wrap the tarp material around the button
Secure with paracord wrapped tightly several times below the button
This technique distributes tension and handles significant loads
⛺ Tent Repair
Broken poles: splice with a smaller inner pole as an internal sleeve, secure with duct tape across the entire break + 10 cm each side. In the field without materials: lash a straight branch externally with paracord.
Stuck or broken zip: stuck zip — apply candle wax, dry soap, pencil graphite or vaseline to the teeth. Detached zipper pull — replace with a paracord loop or clip. Irreparable zip — close the gap with internal safety pins + external duct tape.
Seam opening: use waxed dental floss — stronger and more waterproof than regular thread. Apply seam sealer over the repaired stitch.
Tent floor hole: repair as with tarp. Internally, add a layer of emergency mylar as extra protection.
🌿 Fully Natural Repairs — No Equipment
Leaf roofing technique:
Collect large quantities of wide leaves (fern, banana, palm)
Apply bottom to top like overlapping tiles — each layer covers the top half of the layer below
Minimum 30 cm of thickness for reasonable waterproofing
Reapply after heavy rain — compacted leaves lose thickness
Bark roofing: birch and certain pine barks are naturally waterproof. Use as flat tiles or fold into channels to redirect water.
Moss and clay caulking: compacted moss + wet clay works as natural mortar to seal gaps in wood or stone shelters.
🎥 Watch: How to repair field equipment with improvised resources:

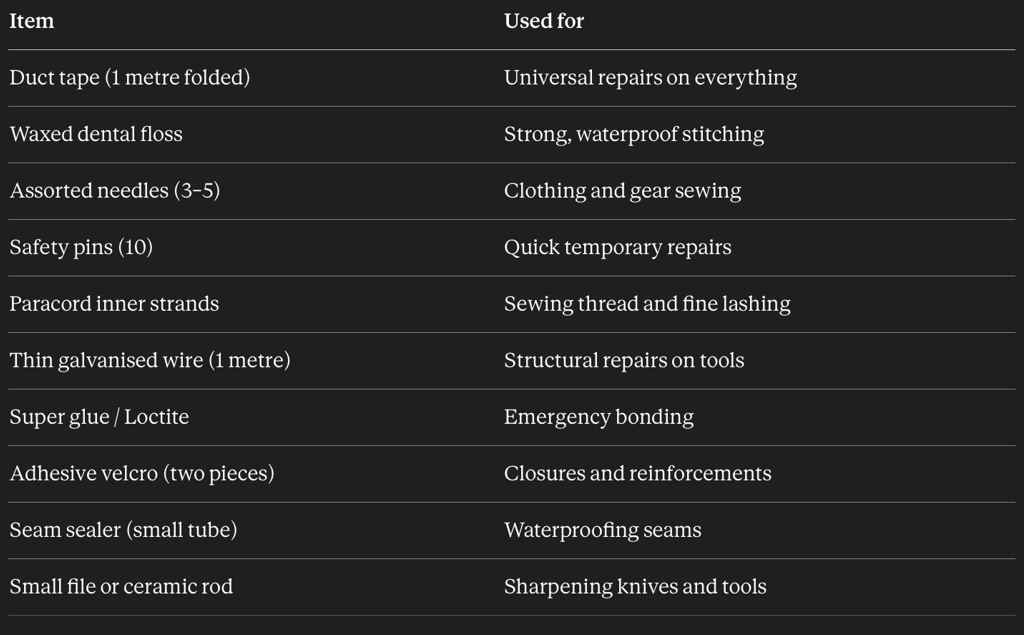
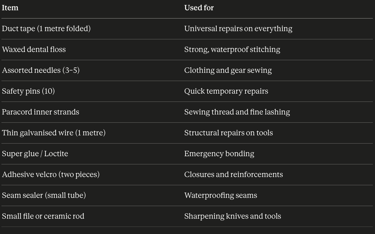
🧰 Universal Repair Kit for Your Pack
Fits in a 15 x 10 cm pouch and weighs under 300g — but solves 90% of field problems:
🧭 Golden Rules for Field Repairs
Repair early — a 1 cm hole becomes 10 cm through neglect
Clean before repairing — dirt and moisture prevent bonding, stitching and adhesion
Over-engineer repairs — in the field, over-build the repair. This is not the time to save duct tape
Test before trusting — before depending on a repair, test it under real load
Prevent before repairing — inspect seams, lashings and tools before every outing
Creativity is your most valuable tool — what you have + what you know = the solution
🔧 Knowing how to repair means knowing how to survive with what you have. Share this guide with everyone who explores, camps and adventures — every skill learned today can be a problem solved tomorrow.
Contact
Contact us for questions or suggestions.
© 2025. All rights reserved.
suportedoisb@gmail.com